
Tyre pressure can transform how a mountain bike feels. Too much air and the wheels skip across roots. Too little and the tyres squirm through corners or strike the rims. The aim is a balance between grip, support and protection, not the lowest or highest number on your pump.
This mountain bike tyre pressure guide offers a practical starting point and a simple test for refining it. Rider weight, tyre size, casing, rim width and terrain affect the result, so treat any mountain bike psi recommendation as an estimate rather than a universal setting.
What MTB tyre pressure should you start with?
For a rider weighing roughly 70–85 kg in riding kit, on 2.35–2.5-inch tubeless trail tyres, around 22–25 psi front and 24–28 psi rear can be a reasonable first experiment. Try 23 psi front and 26 psi rear on mixed trails, for example. These are illustrative figures, not guaranteed safe pressures for every tyre, wheel or rider.
Narrow tyres, lightweight casings, inner tubes and frequent hard impacts may require higher settings. Wider tyres or reinforced casings can behave differently. Before adjusting, check both tyre and rim manufacturer guidance, including applicable pressure limits and approved tyre widths.
Why use different front and rear pressures?
The rear wheel commonly carries more weight, especially when climbing, and encounters repeated impacts. Extra air helps resist rim strikes and sidewall movement. The front tyre is vital for steering traction, so many riders set it slightly lower. Your final front-to-rear difference depends on weight distribution, tyres and riding style.
What changes the ideal pressure?
Weight, including your equipment
Include shoes, tools, water and a riding pack when estimating your load. Heavier riders generally need more tyre support. An e-mountain bike also weighs substantially more than a typical lightweight trail bike, so copying someone else’s numbers without accounting for equipment rarely works well.
Tyre width and rim size
A higher-volume 2.6-inch tyre may allow less pressure than a 2.25-inch tyre under a similar load. But labelled width is not the complete story: internal rim width influences the tyre’s mounted shape and volume. Wider is not automatically better if the tyre and rim are incompatible. For more context, explore our mountain bike tyre size guide.
Casing construction
A supple cross-country casing can ride beautifully but may require extra support to avoid folding or rim damage. Reinforced enduro and downhill casings resist deformation more effectively. Two tyres labelled 2.4 inches can therefore feel entirely different at identical pressures.
Terrain and speed
A slight reduction may help the tread conform to wet roots, loose dirt and rough ground. Smooth hardpack may favour a firmer feel. Fast rock gardens and square-edged impacts demand enough support to protect the wheel. Changing conditions affect your choice, but they never override safe equipment limits.
Tubeless tyre pressure versus inner tubes
Tubeless systems can often run at lower pressure because there is no inner tube to pinch against the rim. That can improve comfort and traction, particularly on uneven trails. However, excessively low tubeless tyre pressure can cause sidewall folding, rim strikes, bead air loss or tyre damage. Use only compatible rims and tubeless-ready tyres with correctly installed sealant.
With inner tubes, pinch flats add another reason to avoid going too low. Foam inserts may protect rims and provide support in some tubeless setups, but do not remove manufacturer restrictions. For help identifying components, see our tubeless mountain bike setup guide.
A repeatable trail test for better grip
Choose a short familiar loop with a climb, a rooty or rocky section and a couple of predictable corners. Use the same reliable low-pressure gauge each time. Different gauges can disagree enough to undermine one-psi experiments.
Establish your baseline
Inflate both tyres to your chosen safe starting values. Record tyre model, casing, width, front pressure, rear pressure and conditions. Ride the loop at a controlled speed, paying attention to braking traction, corner support and the sharpness of impacts.
Adjust one tyre at a time
If the front skips across roots, drop about 1 psi and repeat the section. If it feels vague or folds in a corner, add the air back. If a rear impact produces a hard metallic knock, increase pressure and inspect for damage. Do not repeatedly strike the rim to discover a lower limit.
Compare the whole ride
Imagine 23 psi front grips brilliantly on roots but squirms in fast berms, while 25 psi feels secure yet chatters over small bumps. Test 24 psi next. The best MTB grip setup feels predictable across multiple obstacles, not perfect on only one corner. Keep a note of the result so it is easy to reproduce.
How to recognise incorrect pressure
Excess pressure often causes harsh vibration, a bouncing sensation, reduced braking traction and deflection off rocks. It may feel fast on smooth ground but cost confidence through technical sections because the tread struggles to follow the surface.
Too little pressure produces different warnings: vague cornering, a tyre that rolls sideways, rim impacts or sudden air loss from the bead. Repeated pressure loss may instead point to a puncture, valve issue or sealant problem. Investigate rather than endlessly topping up.
If you need uncomfortably high pressure just to avoid damage, a stronger casing, different width, suitable insert or smoother line choice might help more. Tyres also interact with suspension; consult our mountain bike suspension setup guide when harshness persists despite sensible pressure changes.
Checks before heading out
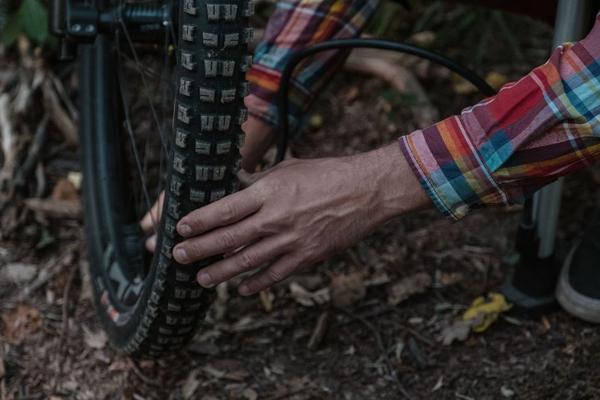
Read the approved pressure range and compatibility information for both tyre and rim, observing whichever restriction is more conservative. Hookless rims especially require the correct tyre construction and approved width. Inspect tread cuts, sidewalls and bead seating. Check pressures before each ride because air can escape gradually and temperature affects readings.
Manufacturer pressure calculators can help establish a baseline using weight, casing, riding surface and rim dimensions. Their outputs still need to be considered against component limits and checked on the trail. A thumb squeeze is not precise enough for consistent MTB tyre pressure adjustments.
Frequently asked questions
There is no single best number. Begin with manufacturer guidance and adjust for riding weight, tyre width, construction, terrain and tube or tubeless setup. Refine the result in small increments on familiar trails.
Not necessarily. Many riders prefer a slightly softer front for steering traction and a firmer rear for support and impact protection. Your setup and terrain determine the most useful difference.
A modest reduction can sometimes help tyres follow slippery roots and uneven soil. Avoid excessive reductions that make the casing unstable or expose the rim to damage.
Before every ride is sensible, especially with tubeless tyres. Small losses can change handling, and consistent measurements make adjustments easier to evaluate.
Make pressure a habit, not a guess
Start with a safe estimate, ride a familiar test loop and change one psi at a time. Record what works. A well-chosen pressure helps the tyre grip without folding, smooths trail chatter without sacrificing wheel protection and makes bike handling more predictable when the trail gets demanding.